A well-maintained air conditioner doesn’t just keep a home comfortable, it runs more efficiently, lasts longer, and costs less to operate. Skipping routine maintenance means higher electric bills, unexpected breakdowns on the hottest days of summer, and premature replacement of expensive equipment. Most homeowners can handle basic upkeep with minimal tools and an hour or two each season. This guide walks through the essential monthly checks, seasonal deep-cleaning tasks, and the warning signs that it’s time to call in a licensed HVAC technician. Whether dealing with a central split system, a ductless mini-split, or a window unit, these practices apply across the board.
Table of Contents
ToggleKey Takeaways
- Regular air conditioner maintenance reduces energy consumption by 15–25% and prevents costly breakdowns during peak summer demand.
- Monthly tasks like checking filters, inspecting vents, and testing condensate drains take only 10–15 minutes but catch the most common AC failures before they worsen.
- Seasonal deep cleaning of evaporator coils, drain lines, and outdoor condenser units before cooling season starts prevents mold growth, maintains airflow, and extends equipment lifespan to the full 12–15 years.
- A well-maintained air conditioner unit requires proof of annual professional service to keep manufacturer warranties valid, and federal law mandates licensed technicians handle refrigerant work.
- DIY maintenance covers filter replacement and basic cleaning, but compressor issues, refrigerant leaks, and ductwork modifications require EPA-certified HVAC professionals to ensure safety and code compliance.
Why Regular AC Maintenance Matters for Your Home
Air conditioners are heat-transfer machines. The refrigerant absorbs warmth indoors, carries it outside, and releases it through the condenser coils. When airflow is restricted by clogged filters, dirty coils, or blocked vents, the system works harder to move the same amount of heat. That extra effort translates directly into higher energy consumption, the Department of Energy estimates that a neglected AC can use 15–25% more electricity than a well-maintained unit.
Beyond the utility bill, deferred maintenance shortens equipment lifespan. Dust and debris force the compressor to cycle more frequently, wearing out contact relays and capacitors. Refrigerant leaks, often caused by corroded coil fins, reduce cooling capacity and can damage the compressor, a repair that often costs as much as replacement. Most central AC systems are designed to last 12–15 years with proper care, but poor maintenance can cut that in half.
Building codes and manufacturer warranties also factor in. Many warranties require proof of annual professional service to remain valid. While local codes don’t typically mandate maintenance schedules for residential HVAC, some jurisdictions require permits for refrigerant handling or electrical work, so homeowners should verify requirements before diving into repairs beyond filter swaps and coil cleaning.
Finally, there’s indoor air quality. A dirty evaporator coil and drain pan become breeding grounds for mold and bacteria, which the blower then circulates throughout the home. Regular cleaning keeps allergens and odors in check, especially important for households with asthma or respiratory sensitivities.
Essential Monthly Air Conditioner Maintenance Tasks
Monthly upkeep focuses on airflow and basic system observation. These tasks take 10–15 minutes and prevent the most common failure modes.
Check the thermostat operation. Set it to cooling mode a few degrees below room temperature and confirm the system kicks on within a minute or two. Listen for unusual sounds, grinding, squealing, or clicking that wasn’t present before. If the thermostat is programmable or smart, verify the schedule matches current routines: energy savings evaporate when the system cools an empty house all day.
Inspect supply and return vents. Walk through each room and make sure vents aren’t blocked by furniture, curtains, or storage. Return vents (typically larger grilles on walls or ceilings) need at least 12 inches of clearance for proper airflow. Blocked returns force the blower to work harder and can freeze the evaporator coil.
Test the condensate drain. Central and ductless systems produce water as humidity condenses on the cold evaporator coil. This drains through a small PVC or vinyl tube, usually routed to a floor drain, sump, or exterior wall. Pour a cup of water into the drain pan (located in the air handler or above the furnace) and verify it drains freely. A clogged line will overflow, damaging ceilings or floors.
Filter Inspection and Replacement
Air filters are the single most important maintenance item. They protect the blower and coils from dust while improving indoor air quality. Most residential systems use disposable fiberglass or pleated filters sized in nominal dimensions, 16×20×1 inch, 20×25×4 inch, etc. Always measure the existing filter: the slot may differ from standard sizes.
Inspect filters monthly. Pull the filter and hold it up to a light. If less than 50% of the surface shows light transmission, it’s time to replace it. Homes with pets, nearby construction, or high dust loads may need monthly replacement. Standard pleated filters (MERV 8–11) offer a good balance of filtration and airflow for most systems. Higher-MERV filters (13+) capture more particles but restrict airflow, which can strain older blowers not designed for the added resistance.
Installation direction matters. Filters have an airflow arrow printed on the cardboard frame. This arrow points toward the blower (into the ductwork), not toward the room. Installing it backward reduces efficiency and lifespan. If the system has a permanent electrostatic filter, rinse it monthly with a garden hose, let it dry completely, and reinstall. Never run the system without a filter, even for a day or two, as debris will coat the evaporator coil and require professional cleaning.
Seasonal Deep Cleaning and Tune-Up Checklist
Before the cooling season starts (late spring in most climates) and again in early fall, homeowners should perform a deeper inspection and cleaning. This work takes 1–2 hours and catches problems before they become expensive.
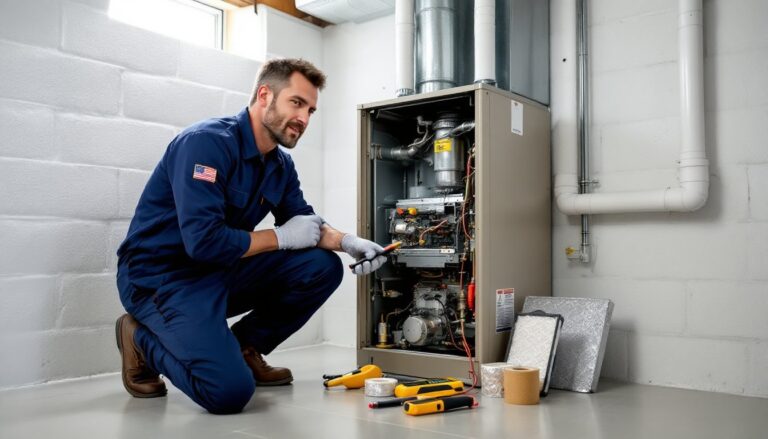
Evaporator coil cleaning. The evaporator coil sits inside the air handler, usually behind a removable access panel. Over time, even with clean filters, a film of dust and organic material builds up. This insulates the coil and reduces heat transfer. Turn off power at the breaker, remove the access panel, and use a soft brush or vacuum with a brush attachment to gently clean the fins. For stubborn grime, apply a no-rinse foaming coil cleaner (available at home centers), let it sit per label instructions, and wipe away residue. Be careful not to bend the aluminum fins, they’re fragile and any deformation restricts airflow.
Drain line flush. Pour a cup of distilled white vinegar or a dedicated condensate pan treatment tablet into the drain pan to kill algae and biofilm. If the line has a cleanout tee (a capped PVC fitting near the air handler), remove the cap and flush with water or use a wet/dry vacuum to pull debris from the exterior end. A clogged drain will trip the overflow float switch and shut down the system.
Inspect ductwork and insulation. If accessible, check supply and return ducts for disconnected joints, tears in flex duct, or crushed sections in attics or crawlspaces. Leaky ducts waste conditioned air and force the system to run longer. Seal gaps with metal-backed foil tape (not fabric duct tape, which degrades) or mastic sealant. Verify that ducts in unconditioned spaces have at least R-6 insulation to prevent condensation and heat gain.
Outdoor Condenser Unit Care
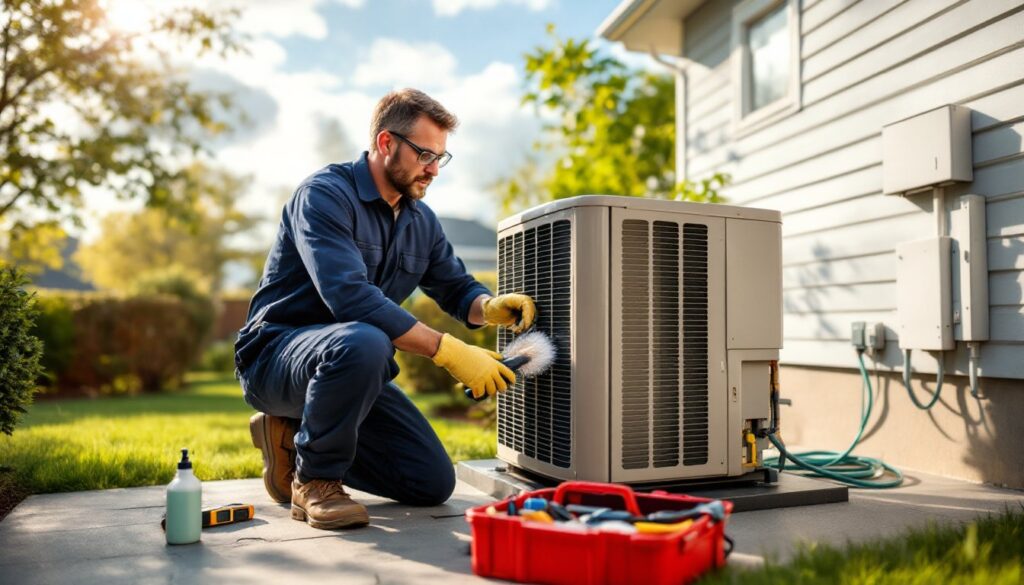
The condenser unit (the big box outside) does the heavy lifting of heat rejection. Keeping it clean and unobstructed is critical for efficiency.
Turn off power at the outdoor disconnect (a metal box mounted on the wall near the unit) before any work. Pull the disconnect block or flip the breaker.
Clear debris. Remove leaves, grass clippings, cottonwood seeds, and other debris from the fins and top grille. Use a shop vacuum or leaf blower to dislodge material trapped in the fins. For caked-on dirt, spray the coils from the inside out with a garden hose fitted with a gentle spray nozzle. Spraying from outside can push debris deeper into the fins. Straighten any bent fins with a fin comb (an inexpensive tool sized to match fin spacing, typically 10–15 fins per inch).
Trim vegetation. Maintain at least 24 inches of clearance on all sides of the condenser. Shrubs, tall grass, and vines restrict airflow and reduce efficiency. Remove any mulch or soil buildup around the base that could block the lower vents.
Level check. The condenser should sit on a level pad, concrete, composite, or gravel. If the unit has settled or tilted, it can strain refrigerant lines and cause compressor oil migration. Use a 4-foot level across the top. Minor adjustments can be made by shimming the pad with composite shims: major settling may require a new pad or professional releveling.
Inspect wiring and connections. With power still off, remove the top or side access panel (usually held by hex-head screws). Look for frayed wires, burned terminals, or signs of rodent damage. Tighten any loose electrical connections with a screwdriver or nut driver. If any wires show damage, that’s a job for an electrician or HVAC tech, this equipment operates on 240 volts, which is dangerous for DIYers without electrical experience.
Many seasonal maintenance tasks become second nature after a couple of cycles. The key is scheduling them before the first heatwave arrives and HVAC companies are booked solid.
When to Call a Professional HVAC Technician
Homeowners can handle the majority of routine upkeep, but certain tasks require EPA Section 608 certification, specialized tools, or diagnostic equipment only professionals carry.
Refrigerant issues. If the system isn’t cooling well, the refrigerant level may be low. Federal law prohibits unlicensed individuals from purchasing or handling refrigerants like R-410A or older R-22. A low charge almost always indicates a leak, which requires locating and repairing before recharging. Topping off without fixing the leak wastes money and harms the environment.
Compressor or capacitor failure. A compressor that won’t start, hums loudly, or trips the breaker likely has a failed run capacitor or internal winding issue. Capacitors store high voltage even when power is off, posing a shock hazard. Compressor replacement is expensive, often $1,200–$2,500, and may justify replacing the entire outdoor unit if it’s over 10 years old.
Ductwork modifications. Adding vents, extending runs, or rebalancing airflow to new additions requires load calculations to avoid over- or under-sizing. Poor duct design causes comfort problems and efficiency losses. Most jurisdictions require permits for duct modifications connected to conditioned spaces.
Annual professional tune-up. Even with diligent DIY maintenance, a yearly service call is worthwhile. Technicians check refrigerant pressures, measure airflow across the coils, test capacitors and contactors, verify correct thermostat operation, and calibrate controls. Many HVAC companies offer maintenance agreements that include priority service and discounts on repairs, valuable when the system fails on a 95°F afternoon.
When in doubt, stop. If a repair involves cutting refrigerant lines, working inside electrical panels, or if the homeowner simply isn’t comfortable with the task, it’s time to call in a licensed pro. The line between maintenance and modification can be fuzzy, and following comprehensive checklists helps clarify which tasks fall into each category. Safety and code compliance always come first.
For general home maintenance planning that includes HVAC alongside other seasonal tasks, resources like The Spruce provide helpful checklists and timelines to keep everything on track.
Conclusion
Air conditioner maintenance isn’t glamorous, but it’s one of the highest-return investments a homeowner can make. An hour of filter changes and coil cleaning each season translates into lower utility bills, fewer emergency repairs, and years of added equipment life. Most tasks require nothing more than a screwdriver, a garden hose, and attention to detail. Know the limits, refrigerant work and electrical troubleshooting belong to the pros, but embrace the routine upkeep that keeps the system running smoothly through every summer.