Ductless heat pumps, also called mini-splits, are efficient, quiet, and flexible. But they won’t stay that way without maintenance. Unlike traditional HVAC systems buried in basements and attics, ductless units sit right in your living spaces, making neglect obvious: weak airflow, musty smells, and higher electric bills. The good news? Most upkeep is straightforward. Homeowners can handle monthly tasks with nothing more than a vacuum and a soft brush, while seasonal deep-cleaning and refrigerant checks require a technician. This guide walks through both, so the system keeps delivering consistent comfort without burning through energy or breaking down mid-season.
Table of Contents
ToggleKey Takeaways
- Regular ductless heat pump maintenance prevents efficiency loss of 20% or more and protects the $3,000–$5,000 investment by keeping manufacturer warranties valid.
- Monthly DIY tasks—rinsing washable filters, clearing debris from the outdoor condenser, and checking drain pans—take just 15 minutes and prevent most common problems.
- Seasonal deep-cleaning before cooling and heating seasons, including coil treatment and drain line flushing, maintains peak performance year-round.
- Professional annual service for refrigerant verification, electrical inspection, and commercial-grade coil cleaning costs $100–$200 but prevents costly compressor failures.
- Call a technician immediately if you notice ice buildup, water leaks, unusual noises, weak airflow despite clean filters, or short-cycling to avoid expensive repairs.
Why Regular Maintenance Matters for Ductless Heat Pumps
Ductless systems move a lot of air through compact indoor units. When filters and coils get clogged, the blower works harder, the compressor runs longer, and efficiency drops fast, sometimes by 20% or more. That means higher bills and shorter equipment life.
Unlike ducted systems where dirt accumulates out of sight, mini-split grime is visible. Dust on the intake grille, mold in the drain pan, and debris around the outdoor condenser all signal neglected maintenance. Left unchecked, these issues cause bigger problems: frozen coils, water leaks, and compressor failure.
Regular cleaning also protects indoor air quality. Filters trap dust, pollen, pet dander, and mold spores. When they’re saturated, contaminants recirculate into living spaces. For households with allergies or asthma, dirty filters aren’t just an efficiency issue, they’re a health one.
Most manufacturers require documented maintenance to keep warranties valid. Skipping annual professional service can void coverage on a system that costs $3,000–$5,000 per zone. That’s a costly gamble.
Monthly DIY Maintenance Tasks You Can Do Yourself
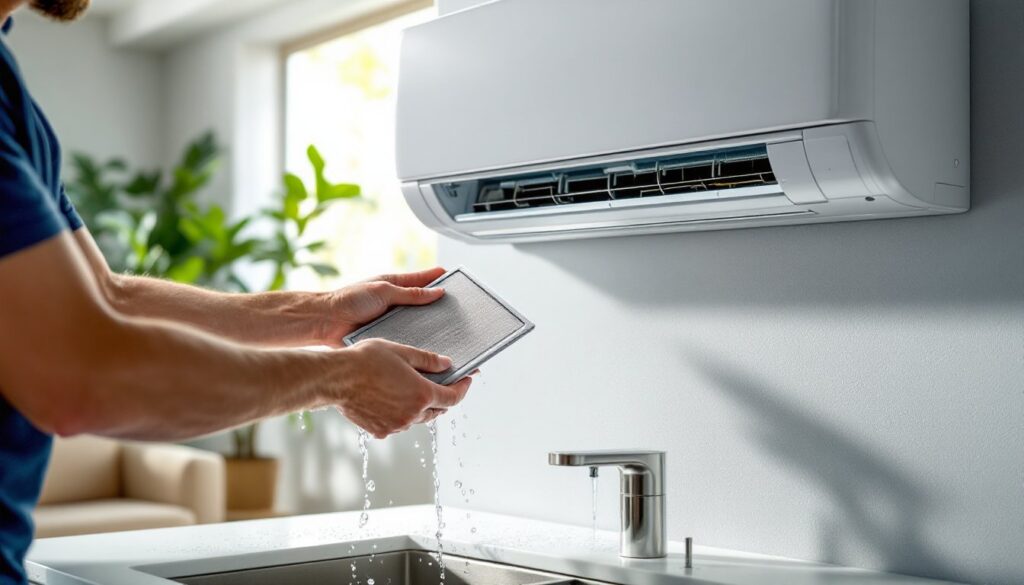
Cleaning Your Indoor Air Handlers
Each indoor head unit has a removable filter behind the front panel. Most systems use washable mesh or electrostatic filters, not disposable pleated ones. Pop the cover open, usually two clips or tabs on the bottom edge, and slide the filters out.
Rinse them under lukewarm tap water. If they’re dusty but not greasy, a quick rinse works. For kitchen units exposed to cooking oils, add a drop of mild dish soap and gently scrub with a soft brush. Avoid harsh cleaners or high-pressure spray: they can damage the mesh.
Let filters air-dry completely before reinstalling. Putting damp filters back invites mold growth inside the unit. While filters dry, wipe down the intake grille and the interior plastic housing with a damp microfiber cloth. Check the drain pan (usually visible once the cover’s off) for standing water or slime. A small amount of moisture is normal, but pooling or odor means the drain line may be clogged.
Some units have a secondary electrostatic or enzyme filter. These often need replacement annually, not washing. Check the owner’s manual.
Safety note: Always turn the unit off at the remote or breaker before opening it. Water and live electrical components don’t mix.
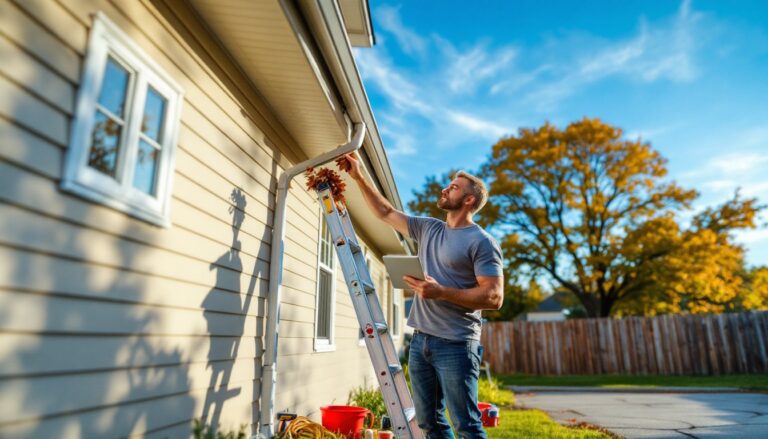
Inspecting and Clearing the Outdoor Unit
The outdoor condenser does the heavy lifting: compressing refrigerant, expelling heat, and moving air through aluminum fins. Debris blocks airflow and forces the compressor to work harder.
Once a month, walk outside and inspect the unit. Clear leaves, grass clippings, mulch, and dirt from around the base. Maintain at least 18–24 inches of clearance on all sides. Trim back shrubs, vines, or overhanging branches.
Check the coil fins (the metal ridges around the unit’s perimeter). Bent or clogged fins reduce airflow. Use a soft brush or a fin comb, a inexpensive tool available at hardware stores, to straighten minor damage. For heavy dirt buildup, spray the coils gently from the inside out with a garden hose. Avoid pressure washers: they bend fins and push debris deeper.
Inspect the concrete pad or mounting bracket. If the unit has settled or tilted, it can strain refrigerant lines and cause vibration noise. Settling usually happens in the first year: after that, it’s stable.
During winter in heating mode, check for ice buildup on the coils. A thin layer during defrost cycles is normal. Thick ice that doesn’t melt indicates a refrigerant issue or a failed defrost sensor, call a tech.
Seasonal Maintenance Checklist for Peak Performance
Twice a year, before cooling season and before heating season, go beyond monthly tasks.
Spring (before cooling):
- Deep-clean indoor filters and coils with a coil cleaner spray (available at HVAC supply stores). Follow product instructions: most require a 10-minute dwell time before rinsing.
- Inspect and clear the condensate drain line. Pour a cup of white vinegar or a commercial drain treatment down the line to dissolve algae and biofilm. If water backs up, the line is clogged, use a wet/dry vac to suction it clear from the outdoor outlet.
- Test cooling mode on a warm day. Each head should blow cold air within a few minutes. Weak cooling or warm air suggests low refrigerant or a compressor issue.
Fall (before heating):
- Clean outdoor coils thoroughly. Summer dust, cottonwood seeds, and pollen cake onto fins.
- Check refrigerant line insulation (the foam tubes running between indoor and outdoor units). UV exposure and animals can damage insulation, causing efficiency loss. Replace torn sections with self-sealing pipe insulation from a hardware store.
- Test heating mode. In heat pump mode, outdoor units pull heat from outside air, so they’ll feel cool to the touch, that’s normal. Indoor heads should blow warm air.
- If you’re in a region with heavy snow, install a condenser cover or snow hood to prevent drifts from burying the unit. Never fully cover the unit during operation: it needs airflow.
Seasonal prep also includes checking the remote control batteries and confirming timer settings. Homeowners often forget about scheduling changes after daylight saving shifts.
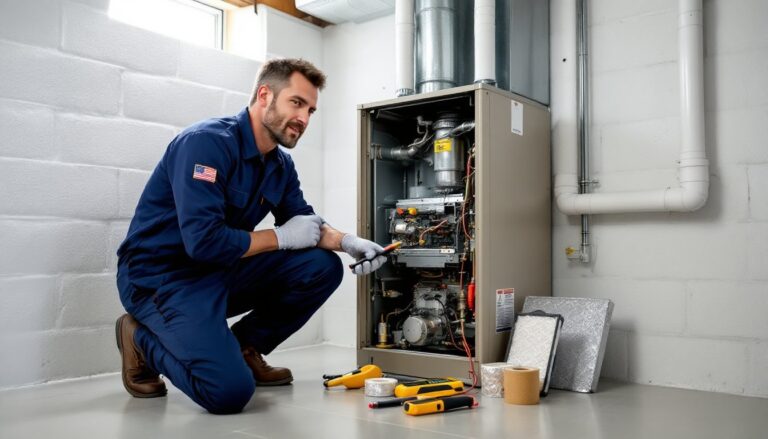
When to Call a Professional Technician
Some tasks are beyond DIY scope and require EPA-certified HVAC technicians. Refrigerant work is federally regulated: handling it without certification is illegal and dangerous.
Annual professional service should include:
- Refrigerant charge verification using manifold gauges. Low refrigerant means a leak, not normal depletion.
- Electrical connection inspection: loose terminals cause arcing and component failure.
- Blower motor lubrication (if applicable) and amp draw testing to catch motor wear early.
- Coil deep-cleaning with commercial-grade cleaners and pressure equipment.
- Thermostat calibration and system performance testing under load.
Typical service costs range from $100–$200 per visit, depending on region and system size. Some contractors offer maintenance plans that bundle annual service with priority scheduling and parts discounts. When hiring, look for HVAC professionals with solid reviews and clear communication about what’s included.
Call a technician immediately if you notice:
- Ice on indoor or outdoor coils (outside of brief defrost cycles)
- Water leaking from the indoor unit
- Grinding, squealing, or clicking noises (could indicate blower or compressor failure)
- Burning smells or tripped breakers
- Weak airflow even though clean filters
- System cycling on and off every few minutes (short-cycling)
Don’t ignore these signs. A $150 service call beats a $2,000 compressor replacement.
If you’re searching for qualified contractors, platforms like Angi and HomeAdvisor let you compare reviews, get quotes, and check licensing. Always verify that any technician is licensed, insured, and EPA-certified for refrigerant handling.
Permit note: Routine maintenance doesn’t require permits. But if a tech recommends replacing the outdoor unit, installing additional heads, or relocating equipment, that work often does. Check local building codes before authorizing major changes.
Conclusion
Ductless heat pumps are reliable, but only if treated right. Monthly filter cleaning and outdoor inspections take 15 minutes and prevent most problems. Seasonal deep-cleaning and annual professional service keep efficiency high and catch issues before they become expensive. Neglect leads to higher bills, shorter equipment life, and uncomfortable rooms. Stay ahead of maintenance, and the system will deliver quiet, efficient heating and cooling for 15–20 years.