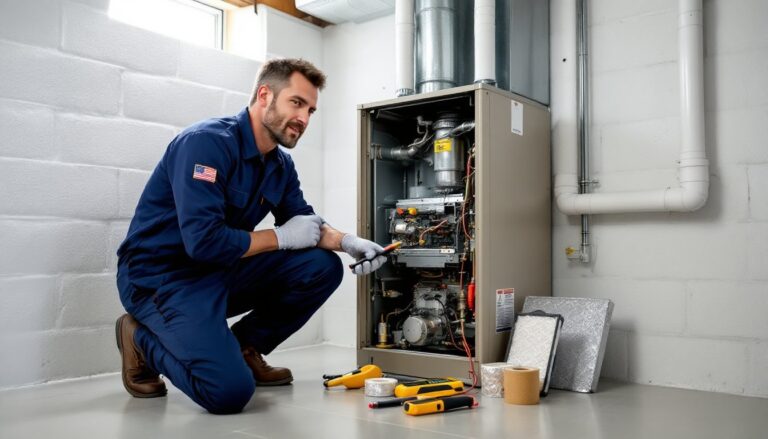
Mini split systems are workhorses, efficient, quiet, and perfect for zoned heating and cooling. But they’re not set-it-and-forget-it appliances. Skip maintenance, and homeowners will watch efficiency drop, energy bills climb, and component failures arrive years ahead of schedule. A well-maintained mini split can run for 15–20 years: a neglected one might struggle past 10. The good news? Most maintenance is straightforward, requires no specialized tools, and takes less time than mowing the lawn. This guide covers the monthly tasks anyone can handle, the seasonal deep cleaning that keeps units humming, and when it’s time to call in a pro.
Table of Contents
ToggleKey Takeaways
- Regular mini split AC maintenance can extend system lifespan to 15–20 years by preventing efficiency drops of 10–25% and protecting the compressor, which costs $800–$2,000 to replace.
- Monthly filter cleaning or replacement and quarterly wipe-downs of indoor and outdoor units are simple DIY tasks that take less than an hour and prevent major performance issues.
- Seasonal deep cleaning of evaporator coils, blower wheels, and condensate drain lines before cooling and heating seasons keeps mini split systems running efficiently and prevents mold and water damage.
- Annual professional refrigerant and electrical inspections ($100–$300) are required by most manufacturers to maintain warranty coverage and catch refrigerant leaks early.
- Ice formation, constant running without temperature control, water leaks, or strange noises indicate professional service is needed, as these signal refrigerant issues, airflow restrictions, or compressor failure.
Why Regular Mini Split Maintenance Matters
Mini split systems operate differently than traditional forced-air HVAC. Each indoor unit (the air handler) connects directly to an outdoor compressor via refrigerant lines, no ductwork, no shared filter system. That means debris, dust, and biological growth accumulate locally in each unit. Left unchecked, dirt clogs evaporator coils, restricts airflow, and forces the compressor to work harder.
The result? Efficiency drops by 10–25% within the first year of neglect. That translates directly to higher electric bills, especially in climates where mini splits run year-round. Worse, accumulated moisture and organic material create ideal conditions for mold and mildew, which can compromise indoor air quality.
From a lifespan perspective, dirty coils and blocked filters cause compressor strain. The compressor is the most expensive component in a mini split system, replacement typically costs $800–$2,000 depending on capacity and refrigerant type (R-410A vs. newer R-32). Regular maintenance extends compressor life, prevents refrigerant leaks, and keeps warranty coverage intact. Most manufacturers require proof of annual professional service to honor warranties beyond the first year.
Finally, local codes may require periodic inspection, particularly for systems using more than 4 pounds of refrigerant (common in multi-zone setups). While cosmetic cleaning doesn’t require a permit, refrigerant work and electrical repairs do, and they must be handled by EPA-certified technicians.
Monthly Mini Split Maintenance Tasks You Can Do Yourself
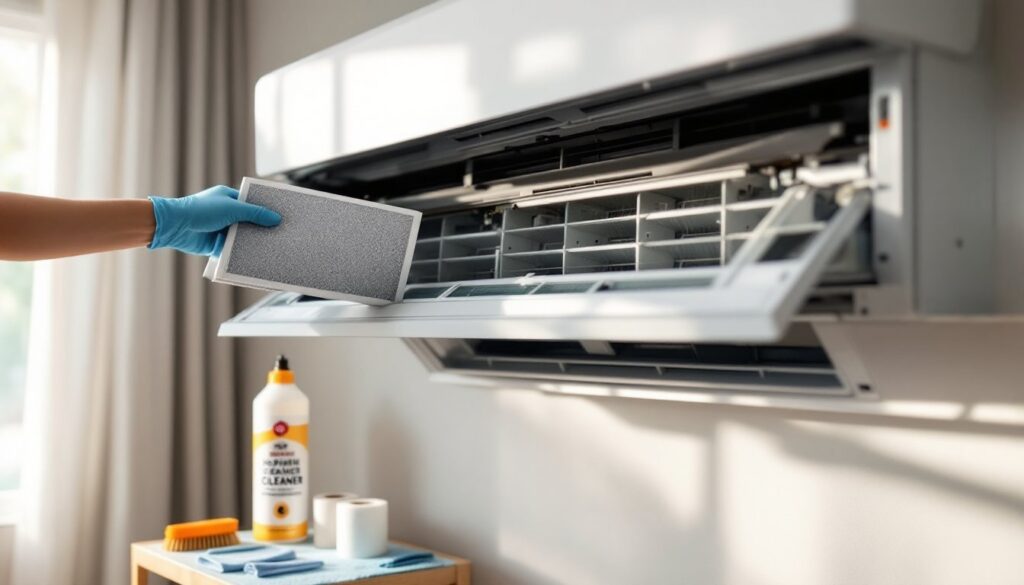
Cleaning and Replacing Air Filters
Every mini split air handler has a removable filter panel behind the front grille. Most units use washable electrostatic filters, though some budget models use disposable fiberglass media. Check the filter monthly, more often if the home has pets, smoking, or high dust levels.
To clean washable filters:
- Power off the unit at the remote or breaker.
- Lift the front panel (it usually clicks open at the bottom and hinges upward).
- Slide out the filter panel. Most units have two filters side by side.
- Vacuum both sides with a soft brush attachment to remove loose dust.
- Rinse under lukewarm tap water, back side first, until water runs clear.
- Shake off excess water and air-dry completely, at least 2–3 hours. Never reinstall a damp filter.
- Reinstall filters with the airflow direction arrow pointing inward.
For disposable filters (typically 1-inch MERV 6–8 media), replace monthly. Note the size on the filter frame and buy a box of replacements. Generic HVAC filters work fine if dimensions match.
Why this matters: A clogged filter reduces airflow by 30–50%, forcing the evaporator coil to run colder and potentially ice over. Ice buildup damages the coil fins and stresses the compressor.
Wiping Down Indoor and Outdoor Units
Dust and grime on the unit housing doesn’t affect performance, but buildup around vents and louvers does.
For indoor units:
- Power off the system.
- Wipe the exterior housing and louvers with a damp microfiber cloth. Avoid spraying cleaner directly on the unit, mist the cloth instead.
- Use a vacuum crevice tool to clear dust from the air intake vents along the top of the unit.
- Check the condensate drain pan (visible when the front panel is open). Wipe out any standing water or slime with a cloth. A small amount of moisture is normal: pooling water suggests a clog.
For outdoor units (condenser):
- Clear leaves, grass clippings, and debris from around the unit. Maintain at least 2 feet of clearance on all sides for proper airflow.
- Check the condenser coil fins (visible through the grille). If bent, use a fin comb (available for $10–$15 at hardware stores) to straighten them. Bent fins restrict airflow and reduce heat exchange efficiency.
- Wipe the exterior housing and top grille. Avoid pressure washing, it can bend fins and force water into electrical components.
- Inspect the mounting pad. If the unit has settled or tilted, add shims to level it. An unlevel condenser can cause oil migration issues in the compressor.
This routine takes 15–20 minutes per indoor unit and 10 minutes for the outdoor unit. Do it monthly during cooling season (May–September) and quarterly during heating season.
Seasonal Deep Cleaning for Optimal Efficiency
Twice a year, before cooling season and before heating season, mini splits benefit from deeper cleaning than monthly wipe-downs. This goes beyond filters and addresses the evaporator coil, blower wheel, and condensate drainage.
Evaporator coil cleaning (indoor unit):
The evaporator coil sits behind the filter. It’s a finned aluminum radiator that gets cold (in cooling mode) or hot (in heating mode). Dust that passes through the filter eventually coats the coil, reducing heat transfer.
- Power off the unit and remove the filter.
- Use a soft-bristle brush or compressed air to gently clean the coil surface. Work from top to bottom to avoid pushing debris deeper.
- For stubborn buildup, use a no-rinse evaporator coil cleaner (foaming spray available at HVAC supply stores). Spray evenly, let it foam for 5–10 minutes, and let it drip into the drain pan. These cleaners are designed to evaporate or drain, no rinsing required.
- Never use household cleaners, bleach, or acidic solutions. They can corrode aluminum fins and leave residue that attracts more dust.
Blower wheel cleaning:
The blower wheel (a small squirrel-cage fan) sits behind the evaporator coil and is tough to access without partial disassembly. If airflow seems weak even with clean filters, the blower may be caked with dust.
This job requires removing the unit’s front cover and carefully pulling the blower assembly. If uncomfortable with this, leave it for the annual professional service. For confident DIYers: photograph each step during disassembly, clean the wheel with a damp cloth and soft brush, and reassemble in reverse order.
Condensate drain line flush:
Mini splits produce condensation during cooling. The drain line (a small PVC or vinyl tube) carries water from the indoor unit to the outside or a floor drain. Algae and slime can clog the line, causing water to back up into the drain pan and potentially overflow.
- Locate the drain line terminus (usually outside, near the outdoor unit).
- Pour 4–6 ounces of distilled white vinegar into the drain pan or access port. Let it sit for 30 minutes.
- Flush with a quart of warm water. If water doesn’t flow freely, use a wet/dry vacuum on the exterior drain line terminus to pull the clog out.
- Some installers add a drain pan tablet (slow-release biocide) to prevent future buildup. These are safe and inexpensive ($10 for a year’s supply).
Outdoor condenser coil cleaning:
The condenser coil (on the outdoor unit) exchanges heat with outside air. Cottonwood fluff, pollen, and airborne dust coat it over time.
- Power off the unit at the breaker.
- Remove the top grille (usually held by screws or clips).
- Use a garden hose with a spray nozzle to rinse the coil from the inside out. Spray gently, high pressure bends fins.
- For heavy buildup, use an outdoor coil cleaner (alkaline-based, formulated for aluminum). Spray, let it sit per label instructions, and rinse thoroughly.
- Let the unit dry completely before restoring power.
Seasonal deep cleaning typically takes 1–2 hours per system. Homeowners comfortable with basic disassembly can handle it: those who aren’t should schedule a professional visit twice a year.
When to Call a Professional for Mini Split Service
Some maintenance is straightforward: other tasks require specialized tools, refrigerant certification, or electrical knowledge. Here’s when to call a pro.
Annual refrigerant and electrical inspection:
Refrigerant doesn’t “get used up”, it circulates in a closed loop. If levels drop, there’s a leak. Only EPA-certified technicians can handle refrigerant (per Clean Air Act Section 608). An annual service call includes:
- Refrigerant pressure check (subcooling and superheat measurements)
- Electrical connection inspection and voltage testing
- Compressor amp draw measurement
- Capacitor testing (weak capacitors cause hard starts and premature compressor failure)
Cost: $100–$200 for a single-zone system: $150–$300 for multi-zone. Many HVAC companies offer seasonal maintenance plans that bundle this with priority service.
When performance drops:
Call a technician if:
- The unit runs constantly but doesn’t reach set temperature (possible refrigerant leak, failing compressor, or undersized system).
- Ice forms on the indoor coil or refrigerant lines during cooling mode (indicates airflow restriction or refrigerant issue).
- Water leaks from the indoor unit (clogged drain, cracked drain pan, or improper installation pitch).
- Strange noises, grinding, squealing, or clicking, persist after cleaning (bearing failure, loose components, or failing compressor).
Electrical or structural repairs:
If the breaker trips repeatedly, the unit won’t power on, or the outdoor unit has visible damage (dented housing, bent refrigerant lines), shut it down and call a licensed HVAC contractor. These systems operate on 208–240V circuits and contain high-pressure refrigerant, both hazards for DIYers.
Post-storm inspection:
After severe weather, inspect the outdoor unit for debris impact, shifted mounting, or refrigerant line damage. Even if the unit runs, hidden damage can cause slow refrigerant leaks or compressor stress. A professional inspection costs $75–$150 and can catch issues before they become expensive failures.
Local code requirements:
Some jurisdictions require biennial inspections for systems over a certain capacity. Check with the local building department or search home improvement compliance guides for area-specific rules.
Conclusion
Mini split maintenance isn’t glamorous, but it’s one of the highest-return tasks a homeowner can do. Monthly filter checks and seasonal deep cleaning prevent the vast majority of failures, keep energy bills in check, and extend system life well into the second decade. The work is manageable for anyone comfortable with basic home upkeep, and the tasks that aren’t, refrigerant work, electrical troubleshooting, are clearly defined. Treat the system right, and it’ll return the favor with quiet, efficient climate control for years to come.