Cedar siding offers natural beauty and durability, but it demands consistent upkeep to preserve both. Without proper maintenance, even premium-grade Western Red Cedar can gray, crack, or develop rot within a few seasons. Homeowners who skip the cleaning-staining-sealing cycle often face repairs that cost far more than preventive care. This guide covers the practical tasks needed to keep cedar siding looking good and performing well, from establishing a cleaning schedule to patching damage before it spreads.
Table of Contents
ToggleKey Takeaways
- Cedar siding maintenance requires an annual cleaning cycle, timely staining every three to seven years, and regular sealing to prevent weathering, rot, and costly structural damage.
- Inspect cedar siding twice yearly in spring and fall, paying special attention to north-facing walls, caulk joints, flashing, and areas near water sources to catch problems early.
- Clean cedar siding annually with oxygen bleach and soft-bristle brushes, applying pressure at 1,200–1,500 PSI at a 45-degree angle to avoid driving water behind boards.
- Moisture control is essential for cedar siding preservation—maintain 6-inch clearances from soil, clean gutters twice yearly, extend downspouts 4 feet away, and ensure proper wall ventilation to prevent hidden rot.
- Address split boards, loose fasteners, and rot promptly with wood filler, stainless steel nails, or board replacement; small repairs prevent expensive water intrusion that can damage sheathing and framing.
Why Cedar Siding Requires Regular Maintenance
Cedar is naturally rot-resistant thanks to oils and tannins in the wood, but those compounds break down under UV exposure and moisture cycles. Untreated cedar weathers to a silver-gray patina within 12 to 18 months, a look some homeowners prefer, but one that signals the protective layer is gone.
Once the surface degrades, water penetrates more easily. Expansion and contraction from wet-dry cycles cause splits along the grain, and fungal spores take hold in damp fibers. Left unchecked, surface mildew progresses to sapwood decay, compromising structural integrity.
Finished cedar (stained or sealed) extends the wood’s lifespan significantly, but finishes themselves degrade. Semi-transparent stains typically need recoating every three to five years, while solid-color stains may last five to seven. Clear sealers, though they showcase the grain, often require reapplication every two to three years because they offer less pigment protection against UV.
Climate plays a role. Coastal and humid regions accelerate finish breakdown and biological growth. High-altitude sun exposure speeds UV damage. Homeowners in these zones should inspect siding twice yearly and expect shorter refinishing intervals.
Essential Cleaning and Inspection Schedule
Inspect cedar siding every spring and fall. Walk the perimeter with a notepad, marking areas with visible mildew, peeling finish, cracks, or loose boards. Pay extra attention to north-facing walls (slower drying) and areas near sprinklers or downspouts.
Check caulk joints around windows, doors, and trim. Cracked or missing caulk lets water behind the siding. Inspect flashing at roof-wall intersections and above windows, improper or corroded flashing is a common source of hidden moisture damage.
Look for insect activity. Carpenter bees bore neat half-inch holes: woodpeckers leave ragged cavities. Termite tubes or powder-post beetle frass (fine sawdust) warrant a call to a pest control professional before refinishing.
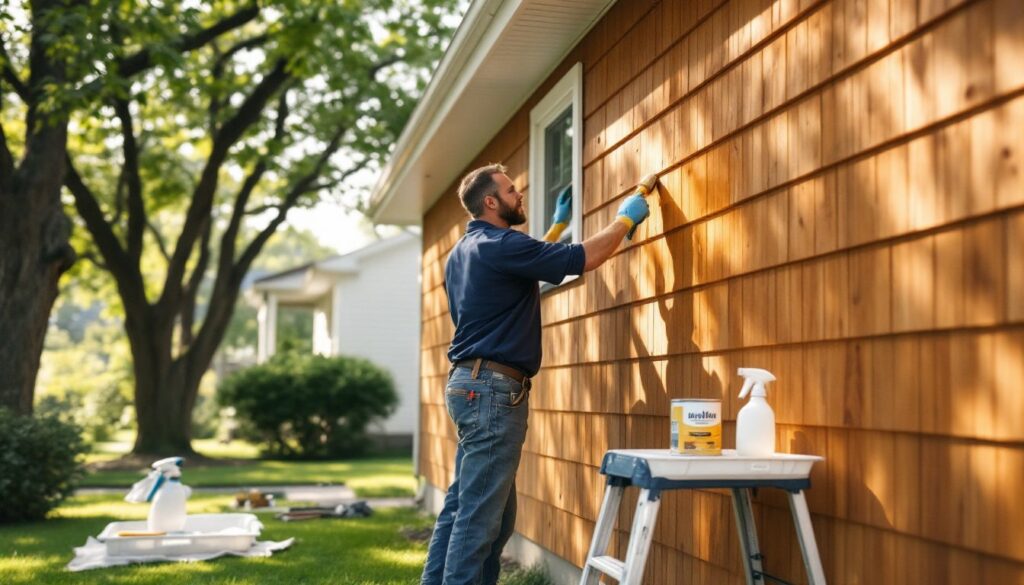
How to Clean Cedar Siding Properly
Clean cedar siding annually, or more often in humid or wooded settings. Dirt and organic debris trap moisture and feed mildew.
Materials and tools:
- Garden hose with spray nozzle or pressure washer (1,200–1,500 PSI max)
- Oxygen bleach (sodium percarbonate) or cedar-safe siding cleaner
- Soft-bristle brush on an extension pole
- Pump sprayer (for cleaner application)
- Safety goggles and nitrile gloves
Steps:
- Pre-rinse the section you’re cleaning to remove loose dust and pollen. Work from top to bottom to prevent streaking.
- Mix cleaner according to label directions. Oxygen bleach is gentler on wood and plants than chlorine bleach and won’t strip color from stained siding. For mildew, a solution of one cup oxygen bleach per gallon of water works well.
- Apply cleaner with a pump sprayer, starting at the bottom and working up to avoid drip stains on dry wood. Let it dwell for 10–15 minutes, keeping the surface wet.
- Scrub gently with a soft-bristle brush to lift embedded grime. Avoid wire brushes, which gouge softwood fibers.
- Rinse thoroughly from top to bottom. If using a pressure washer, hold the wand at a 45-degree angle, 12–18 inches from the surface, and use a wide fan tip (25° or 40°). Never aim perpendicular to the siding or you’ll drive water behind the boards and splinter the surface.
- Allow to dry for at least 48 hours in warm, dry weather before staining or sealing. Cedar should feel dry to the touch and show a moisture content below 15% if measured with a pin-type moisture meter.
Many home improvement professionals recommend testing pressure and cleaner on an inconspicuous section first to confirm you won’t damage the finish or wood.
Staining and Sealing Your Cedar Siding
Stain and sealer selection depends on the desired appearance and maintenance tolerance. Semi-transparent stains highlight grain while offering UV and water protection: they contain more pigment than clear sealers but less than solid stains. Solid-color stains resemble paint and hide imperfections, though they obscure the wood texture. Clear sealers preserve natural color temporarily but require frequent recoating.
Choose an oil-based or water-based formula. Oil-based stains penetrate deeper and are traditional for cedar, but they take longer to dry and require mineral spirits cleanup. Water-based (acrylic) stains dry faster, clean up with water, and emit fewer VOCs, though they may not penetrate as deeply on dense grain.
Always apply stain or sealer to clean, dry wood. Moisture trapped under a fresh finish will blister and peel within months.
Application steps:
- Check weather. Apply stain when temperatures are between 50°F and 85°F, with no rain forecast for 24–48 hours. Avoid direct sun: it causes lap marks as the stain dries too quickly.
- Stir, don’t shake the product to avoid bubbles. Pour a workable amount into a paint tray.
- Use a pump sprayer, roller, or brush. Spraying is fastest for large areas but requires back-brushing to work stain into the grain. A 3/8-inch nap roller works well on smooth or lightly textured siding. For rough-sawn cedar, a natural-bristle brush (oil stains) or synthetic brush (water-based) ensures even coverage.
- Apply one board at a time, working from end to end to maintain a wet edge and prevent lap marks. Wipe drips immediately.
- Apply thin coats. One coat may suffice for semi-transparent stain on new cedar: most situations require two coats for even color and maximum protection. Let the first coat dry per label instructions (typically 4–24 hours) before adding a second.
- Back-roll or back-brush if you spray to push stain into the wood and eliminate runs.
Cedar contains tannins that can bleed through light-colored stains, causing brown streaks. Applying a stain-blocking primer before a solid-color topcoat prevents bleed-through. Some newer stain formulations include tannin blockers.
Plan on restaining every three to five years for semi-transparent products, or when the finish shows chalking, fading, or water absorption (test by splashing water on the siding, if it beads, the sealer is intact: if it soaks in, it’s time to recoat).
Repairing Common Cedar Siding Issues
Splits and cracks: Small splits (under 1/4 inch wide) can be filled with exterior-grade wood filler or elastomeric caulk tinted to match the stain. Clean out debris with a wire brush, apply filler, let it cure, then sand smooth and restain. Wider splits or cracks that run the full length of a board often indicate the board has moved or was installed with insufficient expansion gaps: consider replacing the board.
Loose or warped boards: Cedar expands and contracts with humidity. Boards installed with ring-shank or hot-dipped galvanized nails hold better than smooth-shank fasteners. If a board has popped loose, renail it with stainless steel or hot-dipped galvanized siding nails, driving them into studs (typically 16 inches on center). For cupped or bowed boards that won’t lie flat, replacement is the only reliable fix.
Rot: Probe suspicious areas with an awl or flathead screwdriver. Solid wood resists: rotted wood crumbles or the tool sinks in easily. Surface rot (limited to 1/4 inch depth) can sometimes be scraped out, treated with a wood hardener, filled, and refinished. Deeper rot requires board replacement. Always identify and fix the moisture source, failed flashing, gutter overflow, or ground contact, before installing new material.
Replacing a damaged board:
- Use a pry bar to carefully remove the damaged board, starting at one end. Cedar lap siding is face-nailed: shingle siding may have hidden fasteners.
- Cut the replacement board to length with a miter saw or circular saw. Match the profile (bevel, tongue-and-groove, or shiplap).
- Prime or seal all six sides of the new board before installation to prevent end-grain moisture uptake.
- Nail the board in place, following the original nailing pattern. Drive nails 3/4 inch from edges to avoid splitting, and leave about 1/16 inch between board ends for expansion.
- Caulk joints, let cure, then stain to match.
For extensive damage, consult a licensed contractor. Structural repairs or work involving water intrusion behind the siding may require permits and inspection.
Preventing Moisture Damage and Rot
Moisture is cedar’s primary enemy. Most rot and mildew issues trace back to water that shouldn’t be there.
Maintain clearances: Keep soil, mulch, and vegetation at least 6 inches below the bottom edge of siding. Ground contact wicks moisture into end grain, and mulch traps humidity against the wood. Trim shrubs and tree branches so air circulates freely, stagnant air slows drying.
Control water runoff: Clean gutters twice a year (spring and fall) so water doesn’t overflow onto siding. Extend downspouts at least 4 feet from the foundation, directing runoff away from walls. Grade soil to slope away from the house at a minimum 5 percent pitch for the first 10 feet.
Inspect and maintain flashing: Flashing diverts water away from vulnerable joints. Check that flashing at roof-wall intersections, above doors and windows, and at deck ledger boards is intact and properly lapped. Corroded or missing flashing should be replaced promptly. On homes with frequent siding issues, pros often find that flashing was omitted or installed backward during original construction.
Address sprinkler overspray: Adjust irrigation heads so they don’t hit siding. Constant wetting prevents the wood from drying between cycles, fostering mildew and rot.
Ventilate wall cavities: Ensure wall assemblies include a drainage plane (house wrap or building paper) behind the siding and that weep holes or vents at the bottom and top of the wall cavity allow airflow. Trapped moisture in wall cavities can rot cedar from behind, invisible until serious damage occurs.
Apply a water repellent: On new or freshly milled cedar, a water-repellent preservative (often containing wax or silicone) can be applied before staining. This extra step is especially useful in wet climates. Many experts featured on sites like Bob Vila emphasize that prep work and moisture management prevent more problems than any finish product alone.
Monitor and act quickly: Small issues, peeling finish, a single cracked board, are inexpensive and simple to fix. Ignored, they invite water intrusion that can spread to sheathing, studs, and insulation, turning a $50 repair into a multi-thousand-dollar remediation project.
Conclusion
Cedar siding delivers lasting beauty and performance when homeowners commit to a regular maintenance routine. Annual cleaning, timely refinishing, prompt repairs, and moisture control keep the wood sound and the finish intact. Skipping these tasks doesn’t save time, it multiplies the work and cost down the road. With the right habits, cedar siding can protect and enhance a home for decades.