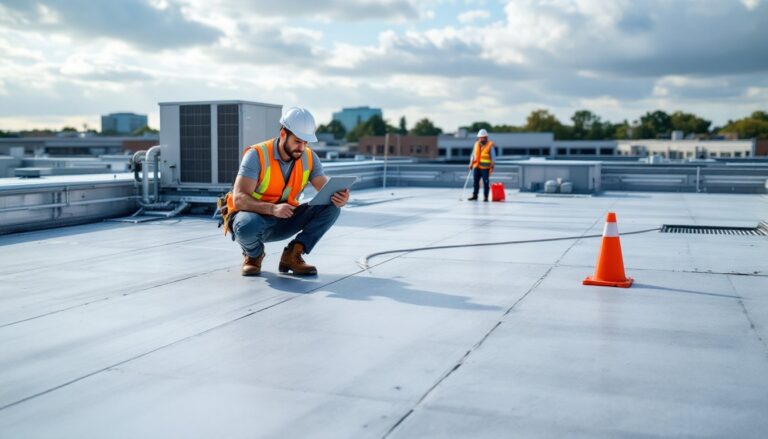
Tankless water heaters deliver endless hot water and energy savings, until mineral buildup clogs the heat exchanger and efficiency drops by 30% or more. Unlike traditional tank models that signal trouble with puddles and rust, tankless units fail quietly. Flow rates slow. Water temperatures fluctuate. Error codes flash. Most homeowners don’t notice until they’re standing under a lukewarm shower wondering what went wrong. The good news? A well-maintained tankless water heater can last 20+ years and maintain factory efficiency. The work isn’t complicated, but it does require consistent attention and a few specific procedures that differ from tank-style maintenance.
Table of Contents
ToggleKey Takeaways
- Regular maintenance on tankless water heaters can extend lifespan to 20+ years and prevent efficiency losses of 30% or more caused by mineral scale buildup.
- Descaling frequency depends on water hardness: hard water requires flushing every 6-12 months, while soft water typically needs annual maintenance.
- Descaling your tankless water heater using white vinegar or manufacturer-approved solutions is a DIY task taking 45-90 minutes and costing only $10-20 versus $150-300 for professional service.
- Quarterly cleaning of inlet screens and filters prevents sediment from reaching the heat exchanger and avoids 90% of flow-related problems.
- Many manufacturers require proof of annual maintenance to honor 10-15 year warranties, making maintenance records essential for protecting your investment.
- Professional help is needed for gas line work, electrical issues, persistent error codes, and severe scale buildup that exceeds DIY capabilities.
Why Regular Maintenance Matters for Tankless Water Heaters
Tankless water heaters operate differently than storage tank models. Instead of keeping 40-50 gallons heated around the clock, they superheat water on demand as it flows through a compact heat exchanger. This process exposes internal components to high temperatures and constant mineral exposure.
Hard water is the primary enemy. Calcium, magnesium, and other dissolved minerals precipitate out when heated, forming scale deposits inside the heat exchanger tubes. Even a thin layer of scale acts as insulation, forcing the burner to work harder and longer to reach target temperatures. This reduces efficiency by 20-40% and can eventually restrict flow enough to trigger safety shutoffs.
Ignoring maintenance shortens the unit’s lifespan dramatically. Manufacturers typically warranty tankless heaters for 10-15 years, but expect 20+ years with proper care. Scale buildup causes the most damage, but clogged air filters, blocked vents, and dirty inlet screens also reduce performance. These issues compound over time, a partially blocked filter forces the burner to run hotter, which accelerates scale formation.
Another consideration: many manufacturers require proof of annual maintenance to honor warranties. Skip the descaling, and you might void coverage on a $1,500+ unit. Keep records of every flush and filter cleaning.
How Often Should You Maintain Your Tankless Water Heater?
Water hardness dictates the maintenance schedule. Hard water (above 7 grains per gallon or 120 mg/L) demands more frequent attention than soft water. Test your water annually with an inexpensive hardness test kit from any hardware store, or check your municipal water quality report.
For hard water areas: Flush and descale the heat exchanger every 6-12 months. Some manufacturers recommend quarterly flushes in extreme hardness zones (15+ grains per gallon). If you notice reduced flow rate, temperature fluctuations, or the unit running longer to heat water, descale immediately regardless of the calendar.
For soft water or treated water: Annual descaling is typically sufficient. Many homeowners with whole-house water softeners extend this to 18 months without issues. But, even softened water contains some minerals, so don’t skip maintenance entirely.
Quarterly checks: Inspect and clean the inlet screen filter every 3 months. This takes five minutes and prevents sediment from reaching the heat exchanger. Also visually check vent pipes for obstructions, birds, insects, and debris can block exhaust vents.
Monthly quick checks: Glance at the control panel for error codes. Most modern units display fault codes when sensors detect problems. Catching issues early prevents expensive repairs. Adding these tasks to your broader home maintenance schedule keeps the system running smoothly year-round.
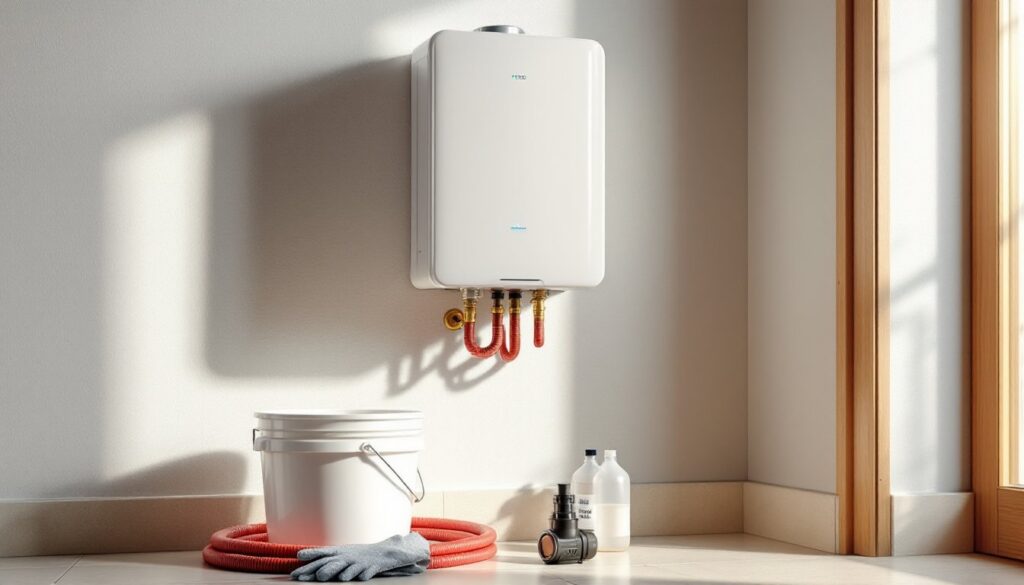
Descaling Your Tankless Water Heater: Step-by-Step Process
Descaling removes mineral deposits from the heat exchanger using a mild acidic solution circulated through the unit. This is the single most important maintenance task for tankless heaters. The procedure takes 45-90 minutes depending on scale severity.
What You’ll Need for a Complete Flush
Materials:
- 3-4 gallons of white vinegar (for moderate scale) or commercial descaling solution designed for tankless heaters. Vinegar works for routine maintenance: heavy scale requires stronger acids.
- Two 3-foot washing machine hoses with ¾-inch fittings
- 5-gallon bucket
- Submersible utility pump rated for at least 4 gallons per minute
Tools:
- Adjustable wrench or channel locks
- Screwdriver (type varies by model)
- Safety goggles and chemical-resistant gloves
Step-by-step descaling process:
-
Shut off power and water. Turn off the gas supply valve or flip the circuit breaker. Close the cold water isolation valve leading into the heater. Open a hot water faucet somewhere in the house to relieve pressure.
-
Remove service port caps. Locate the cold water inlet and hot water outlet service ports, usually blue and red caps on the bottom of the unit. Place a towel underneath: residual water will drip out. Unscrew both caps using an adjustable wrench.
-
Attach hoses. Connect one hose from the pump to the cold water service port. Connect the second hose from the hot water service port back to the bucket. The setup creates a closed loop: pump pushes descaling solution into the cold inlet, solution flows through the heat exchanger, and exits through the hot outlet back to the bucket.
-
Fill bucket and start circulation. Pour 3-4 gallons of white vinegar into the bucket. Submerge the pump and turn it on. Let the solution circulate for 45-60 minutes. The vinegar dissolves calcium carbonate and other mineral deposits. For annual maintenance, following professional descaling guidelines ensures thorough cleaning.
-
Flush with clean water. After circulating vinegar, dump the bucket and rinse it. Fill with fresh water. Remove the hose from the hot water port and let the pump flush clean water through the cold inlet for 5 minutes. This rinses residual vinegar and loosened scale.
-
Reassemble and test. Remove hoses, reinstall service port caps with new rubber washers (replace washers annually, they’re cheap insurance against leaks). Open the cold water isolation valve slowly. Check for leaks at the service ports. Restore power/gas and run hot water at multiple fixtures to purge air from the system.
Safety note: Never use harsh acids like hydrochloric or sulfuric acid. They can damage copper or stainless steel heat exchangers. Stick with vinegar or manufacturer-approved descaling solutions.
Cleaning the Air Filter and Inlet Screen
Two simple maintenance tasks prevent most tankless water heater problems: cleaning the air intake filter and flushing the cold water inlet screen.
Air filter cleaning (every 3-6 months):
Tankless units need clean combustion air. A clogged air filter starves the burner, triggers incomplete combustion, and can cause sooting. Most units have a removable foam or mesh filter near the bottom or side panel.
- Shut off power to the unit.
- Remove the front cover panel using a screwdriver (typically 2-4 screws).
- Locate and slide out the air filter, it looks like a rectangular foam pad or pleated paper filter.
- Rinse foam filters under warm water. Squeeze gently and let air-dry completely. Replace pleated paper filters every 12 months.
- Reinstall the filter and cover panel.
Inlet screen cleaning (every 3 months):
The cold water inlet has a fine mesh screen that catches sediment before it reaches the heat exchanger. Even city water contains particulates from aging pipes. Well water can be far worse.
- Turn off the cold water isolation valve.
- Remove the service port cap on the cold water inlet.
- Use needle-nose pliers to pull out the small cylindrical screen filter.
- Rinse under running water while brushing with an old toothbrush. Check for tears or damage: replace if necessary.
- Reinstall the screen and service cap with a new washer.
These two tasks take less than 15 minutes combined and prevent 90% of flow-related problems. Homeowners who stay current with these routine tasks, along with other seasonal maintenance priorities, avoid most emergency service calls.
Inspecting Vents and Checking for Error Codes
Vent inspection should happen twice a year, especially before and after winter. Tankless water heaters use either concentric vents (exhaust and intake in one pipe) or separate PVC pipes for intake and exhaust. Both types can develop problems.
Walk outside and visually inspect the vent termination. Look for:
- Bird nests or insect hives blocking the opening
- Damaged or disconnected vent pipes
- Snow or ice accumulation covering the vent (in winter)
- Leaves, grass clippings, or debris piled against the intake
Vent blockages cause backdrafting, incomplete combustion, and carbon monoxide risk. Most modern units have pressure switches that shut down the burner if airflow is restricted, but don’t rely on safety devices alone.
Indoors, check that PVC vent pipes are properly supported and haven’t sagged or separated at joints. Building codes typically require support every 3 feet for horizontal runs. Condensation is normal in condensing tankless heaters, moisture dripping from vent joints is not. Tighten loose connections or call a plumber if leaks persist.
Error code monitoring:
Most tankless units have a digital display showing error codes when problems occur. Common codes include:
- Flame failure codes – Often caused by gas supply issues, blocked vents, or dirty flame rods
- Overheat warnings – Usually indicate scale buildup reducing heat transfer
- Flow sensor errors – Sediment in the inlet screen or failing sensors
Check your owner’s manual for model-specific codes. Many minor errors reset after descaling or cleaning filters. Write down recurring codes, they help diagnose patterns that indicate specific component failures. For persistent error codes or complex diagnostics, following expert troubleshooting advice can clarify when professional help is necessary.
When to Call a Professional vs. DIY Maintenance
Routine maintenance is well within most homeowners’ capabilities. Descaling, cleaning filters, and inspecting vents require no specialized skills beyond following instructions. The main requirement is time and attention to detail. Basic hand tools and a submersible pump (about $30-40 at any hardware store) cover the equipment needs.
Call a licensed plumber or HVAC technician for:
- Gas line work. Any modification to gas piping requires a licensed professional and permits in most jurisdictions. Never attempt to move, extend, or modify gas connections.
- Electrical issues. If the unit won’t power on, circuit breakers trip repeatedly, or you smell burning, shut off power and call an electrician. Tankless heaters draw significant amperage, 40-50 amps for whole-house electric models.
- Persistent error codes after maintenance. If descaling and filter cleaning don’t resolve fault codes, internal components may have failed. Circuit boards, flame sensors, flow sensors, and gas valves require diagnostic tools and replacement parts best handled by trained technicians.
- Major scale buildup. If the heat exchanger is severely clogged (flow rate dropped by 50% or more), professional-grade descaling equipment and stronger acids may be necessary.
- Annual inspection in hard water areas. Some manufacturers recommend professional inspection alongside owner-performed descaling. Techs can measure combustion efficiency, check gas pressure, and verify proper venting, things homeowners can’t easily assess.
Cost considerations: Professional descaling and inspection runs $150-300 depending on region and service complexity. DIY descaling costs $10-20 for vinegar or descaling solution. Over a 20-year lifespan, DIY maintenance saves $2,000-4,000 compared to annual professional service.
That said, don’t skip pro service if you’re uncomfortable with the work or lack mechanical aptitude. A botched descaling attempt (damaged service port threads, forgotten washers causing leaks) can cost more than hiring help upfront.
Safety reminder: Always wear safety goggles and chemical-resistant gloves when handling descaling solutions. Even vinegar splashes sting. Work in a ventilated area and never mix vinegar with other chemicals.